
Detailed installation for podium slab waterproofing

AVA Nob Hill - Podium Membrane
San Francisco
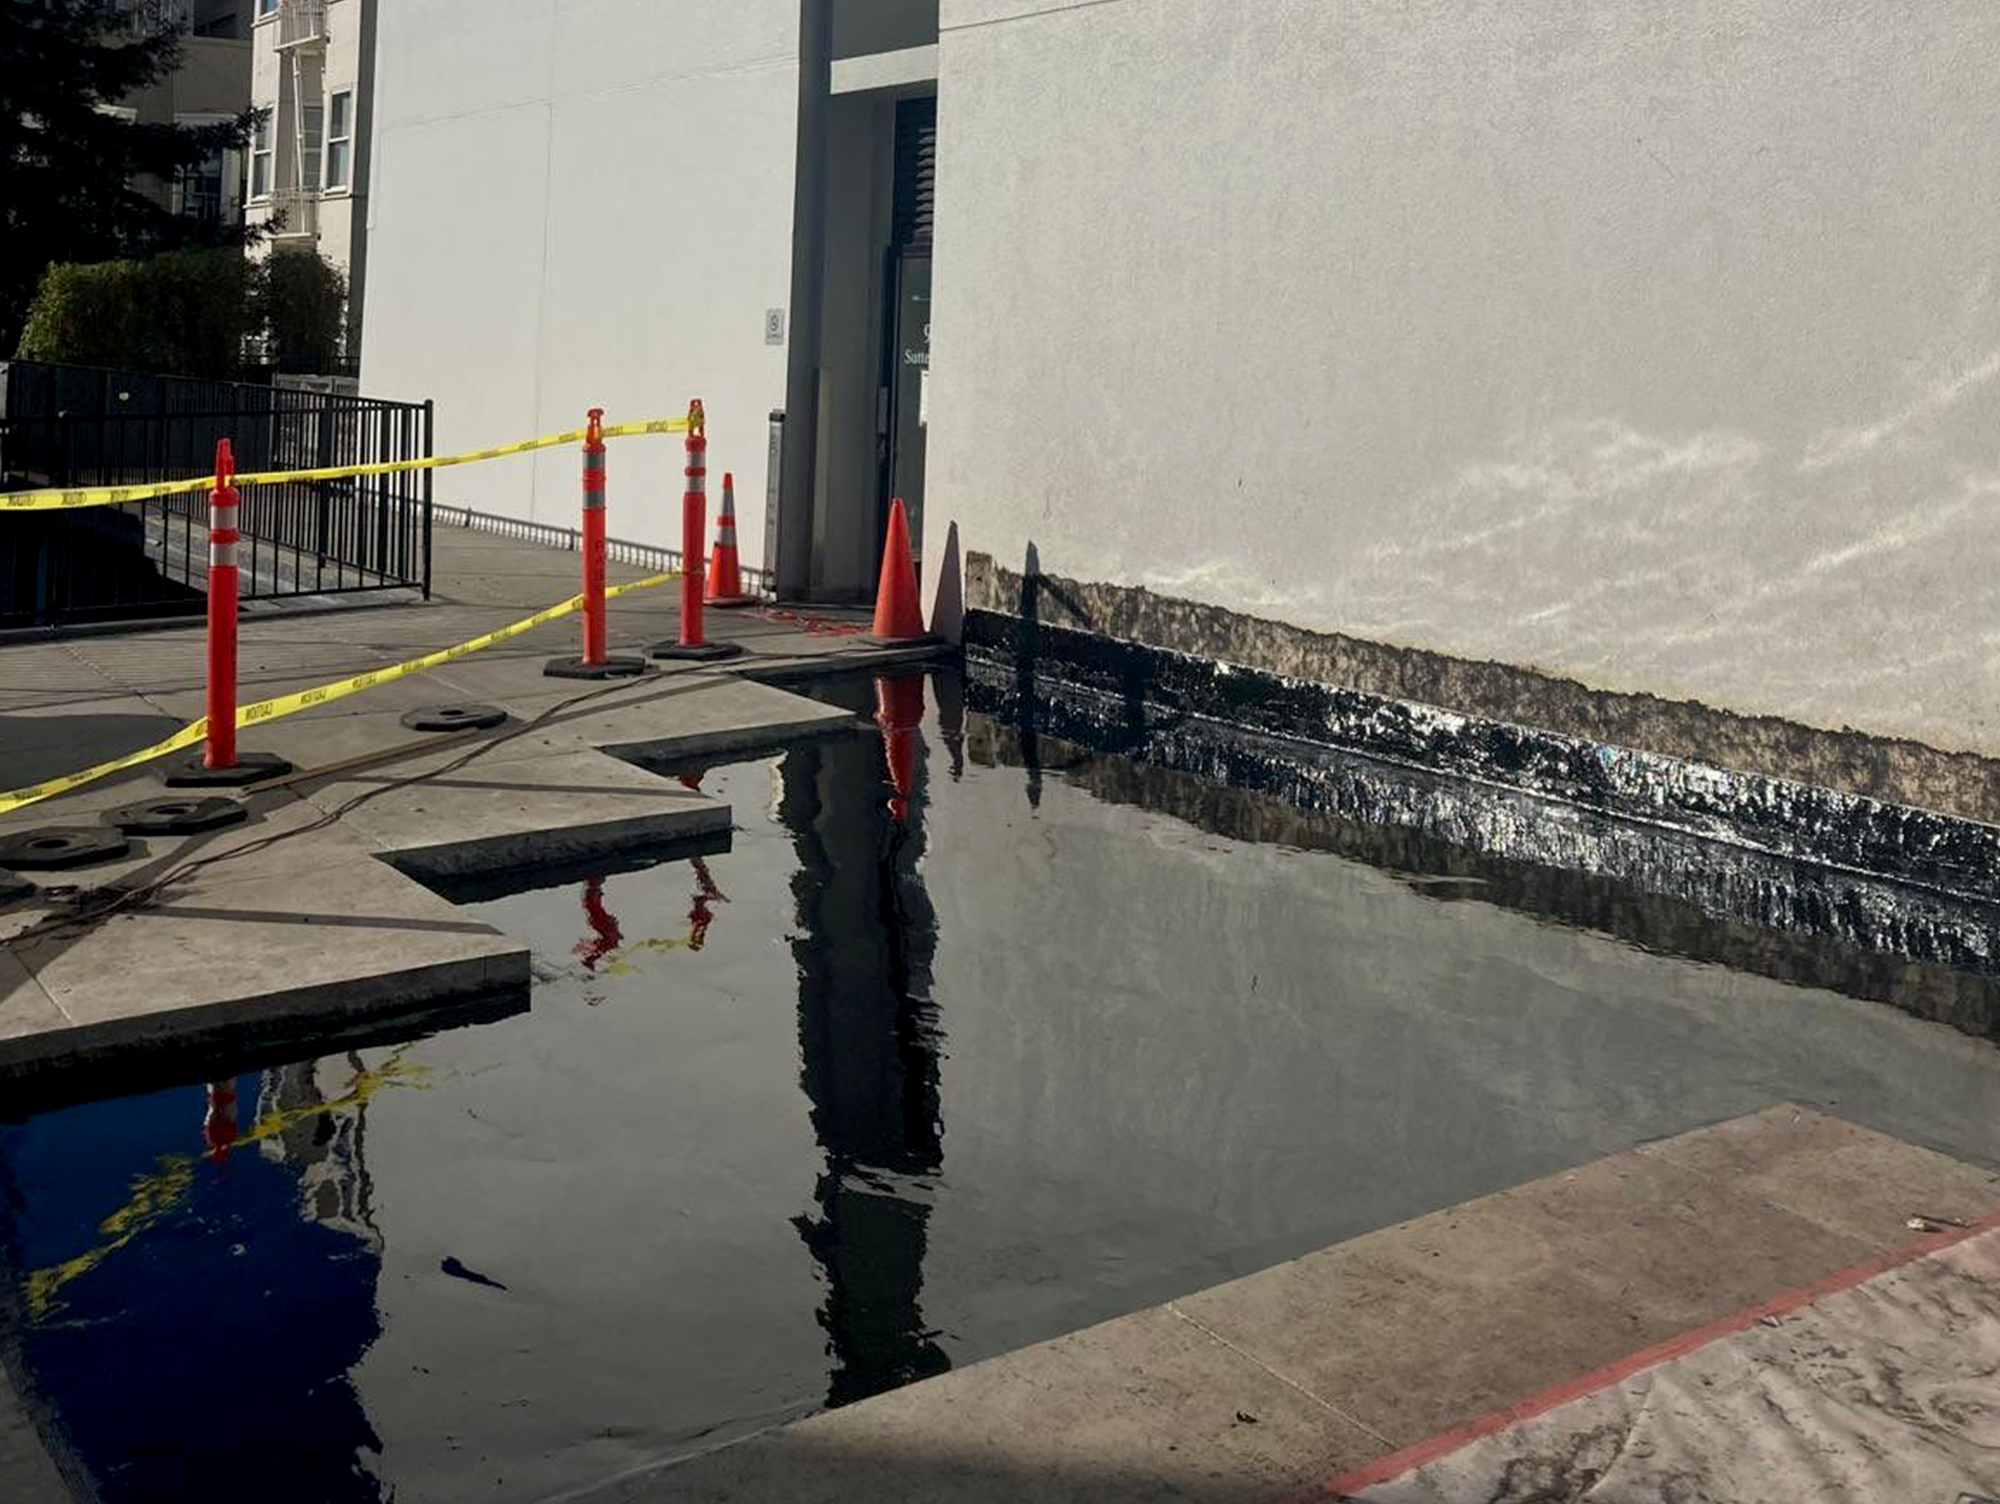
In order to claim more common area space in a courtyard of a residential highrise, the owners removed a large planter box that, besides taking up space, was leaking into the garage below. The general contractor was hired to demo the topping slab and install a new one, but first we needed to re-waterproof the newly exposed area.
Podium slab waterproofing is critical to protect the structural slab underneath from spalling and cracking and also to keep chloride-filled water from leaking down below and damaging cars or other items; however, it requires an experienced team to execute this detailed installation.
What We Did
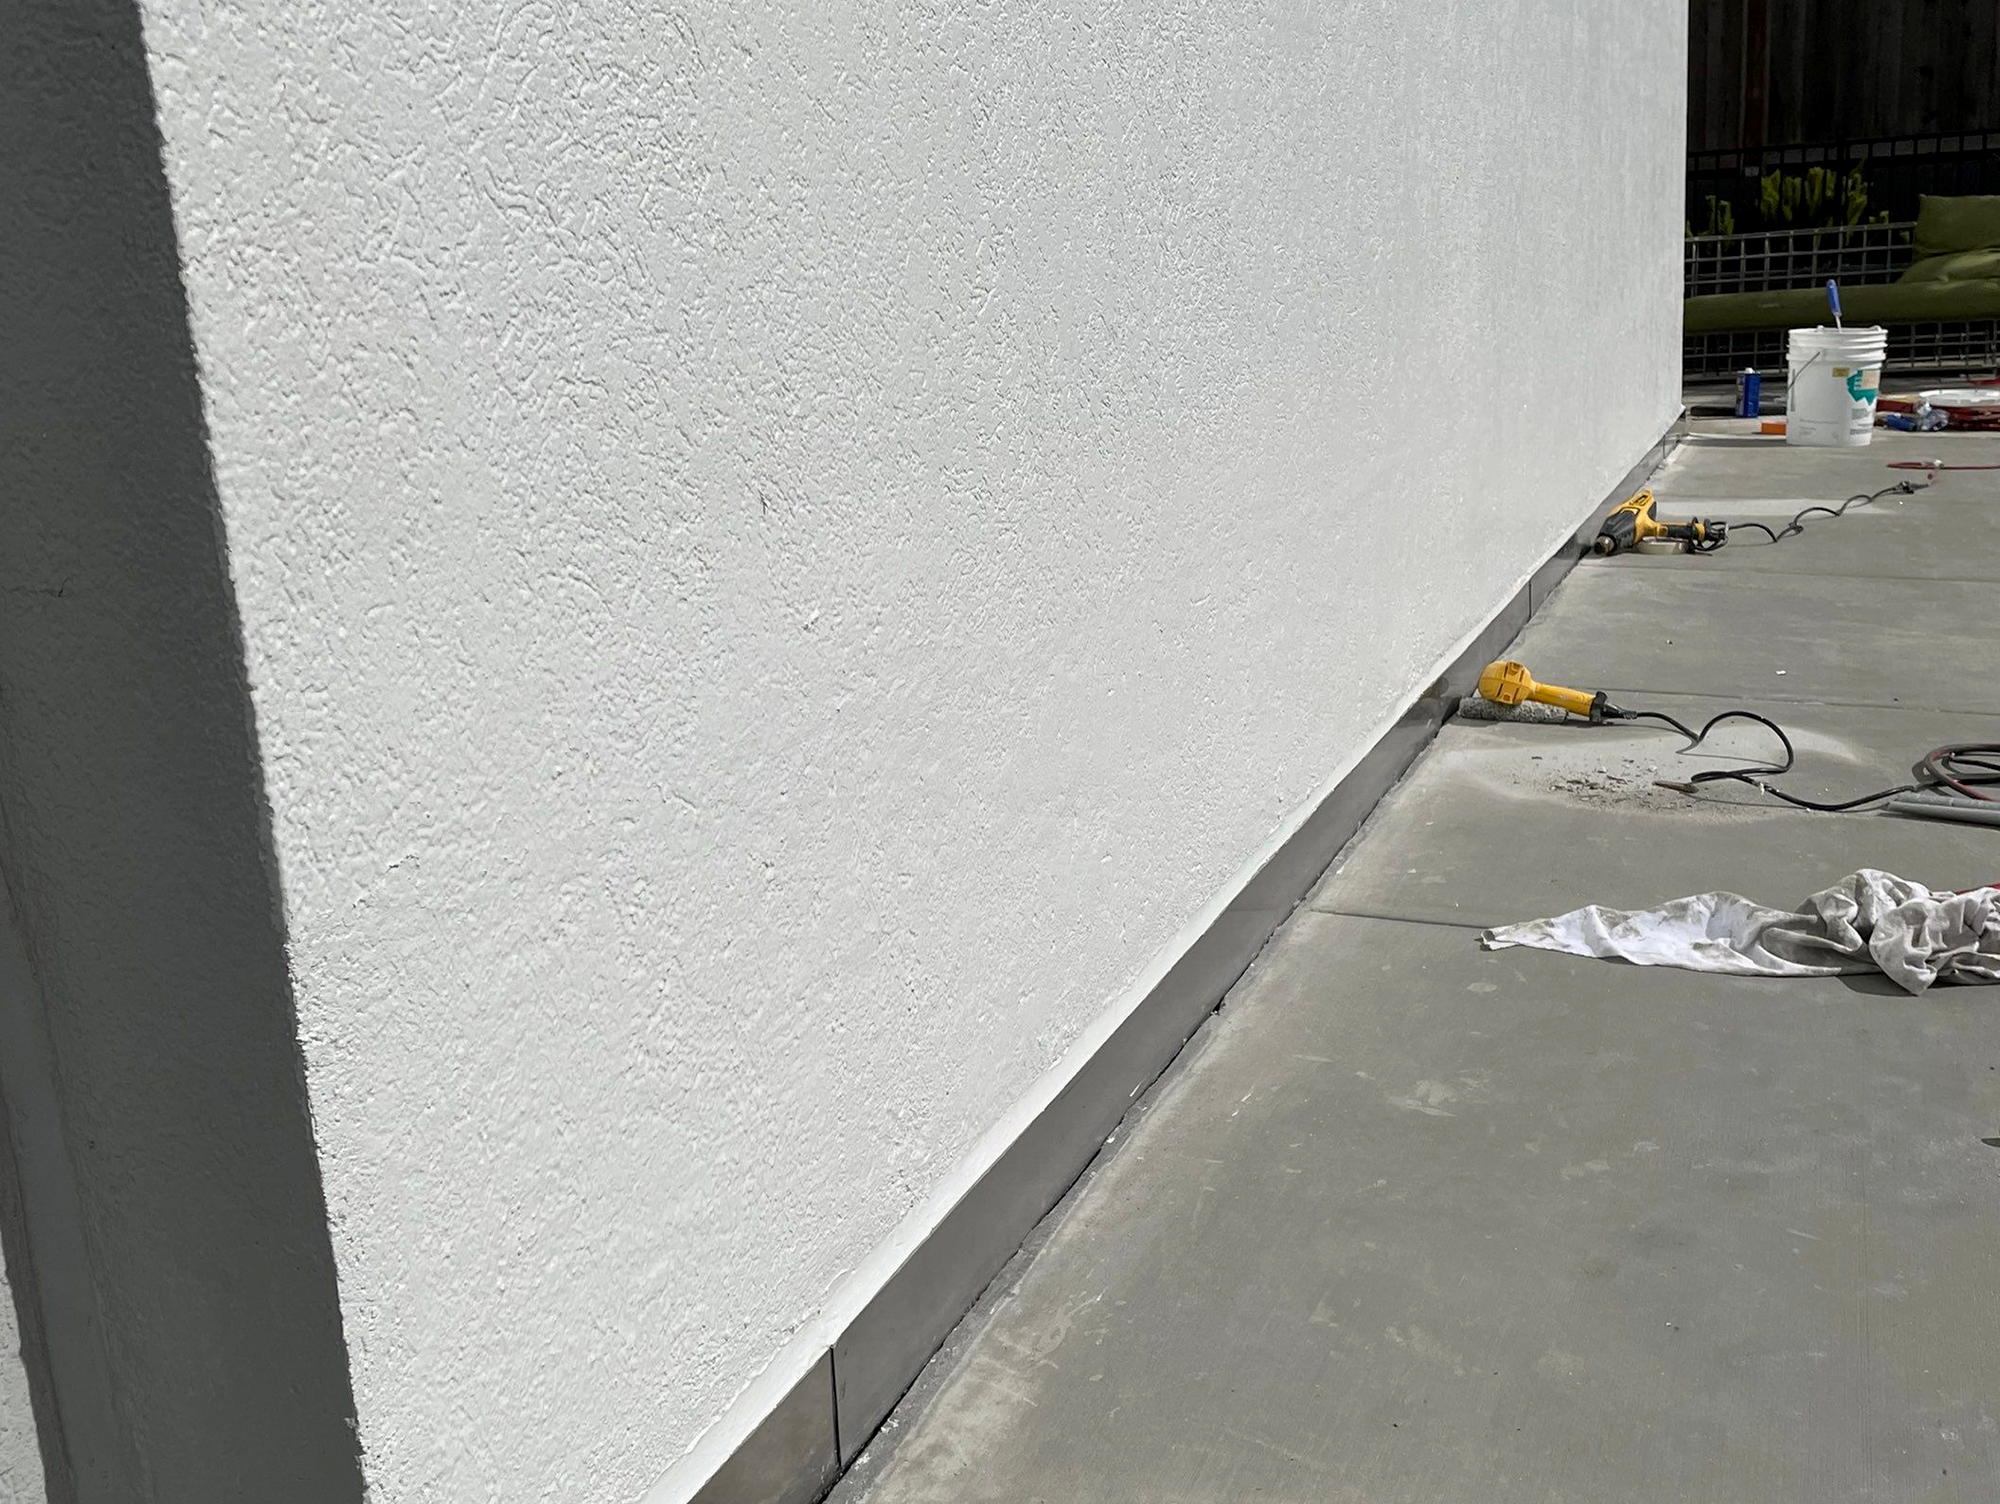
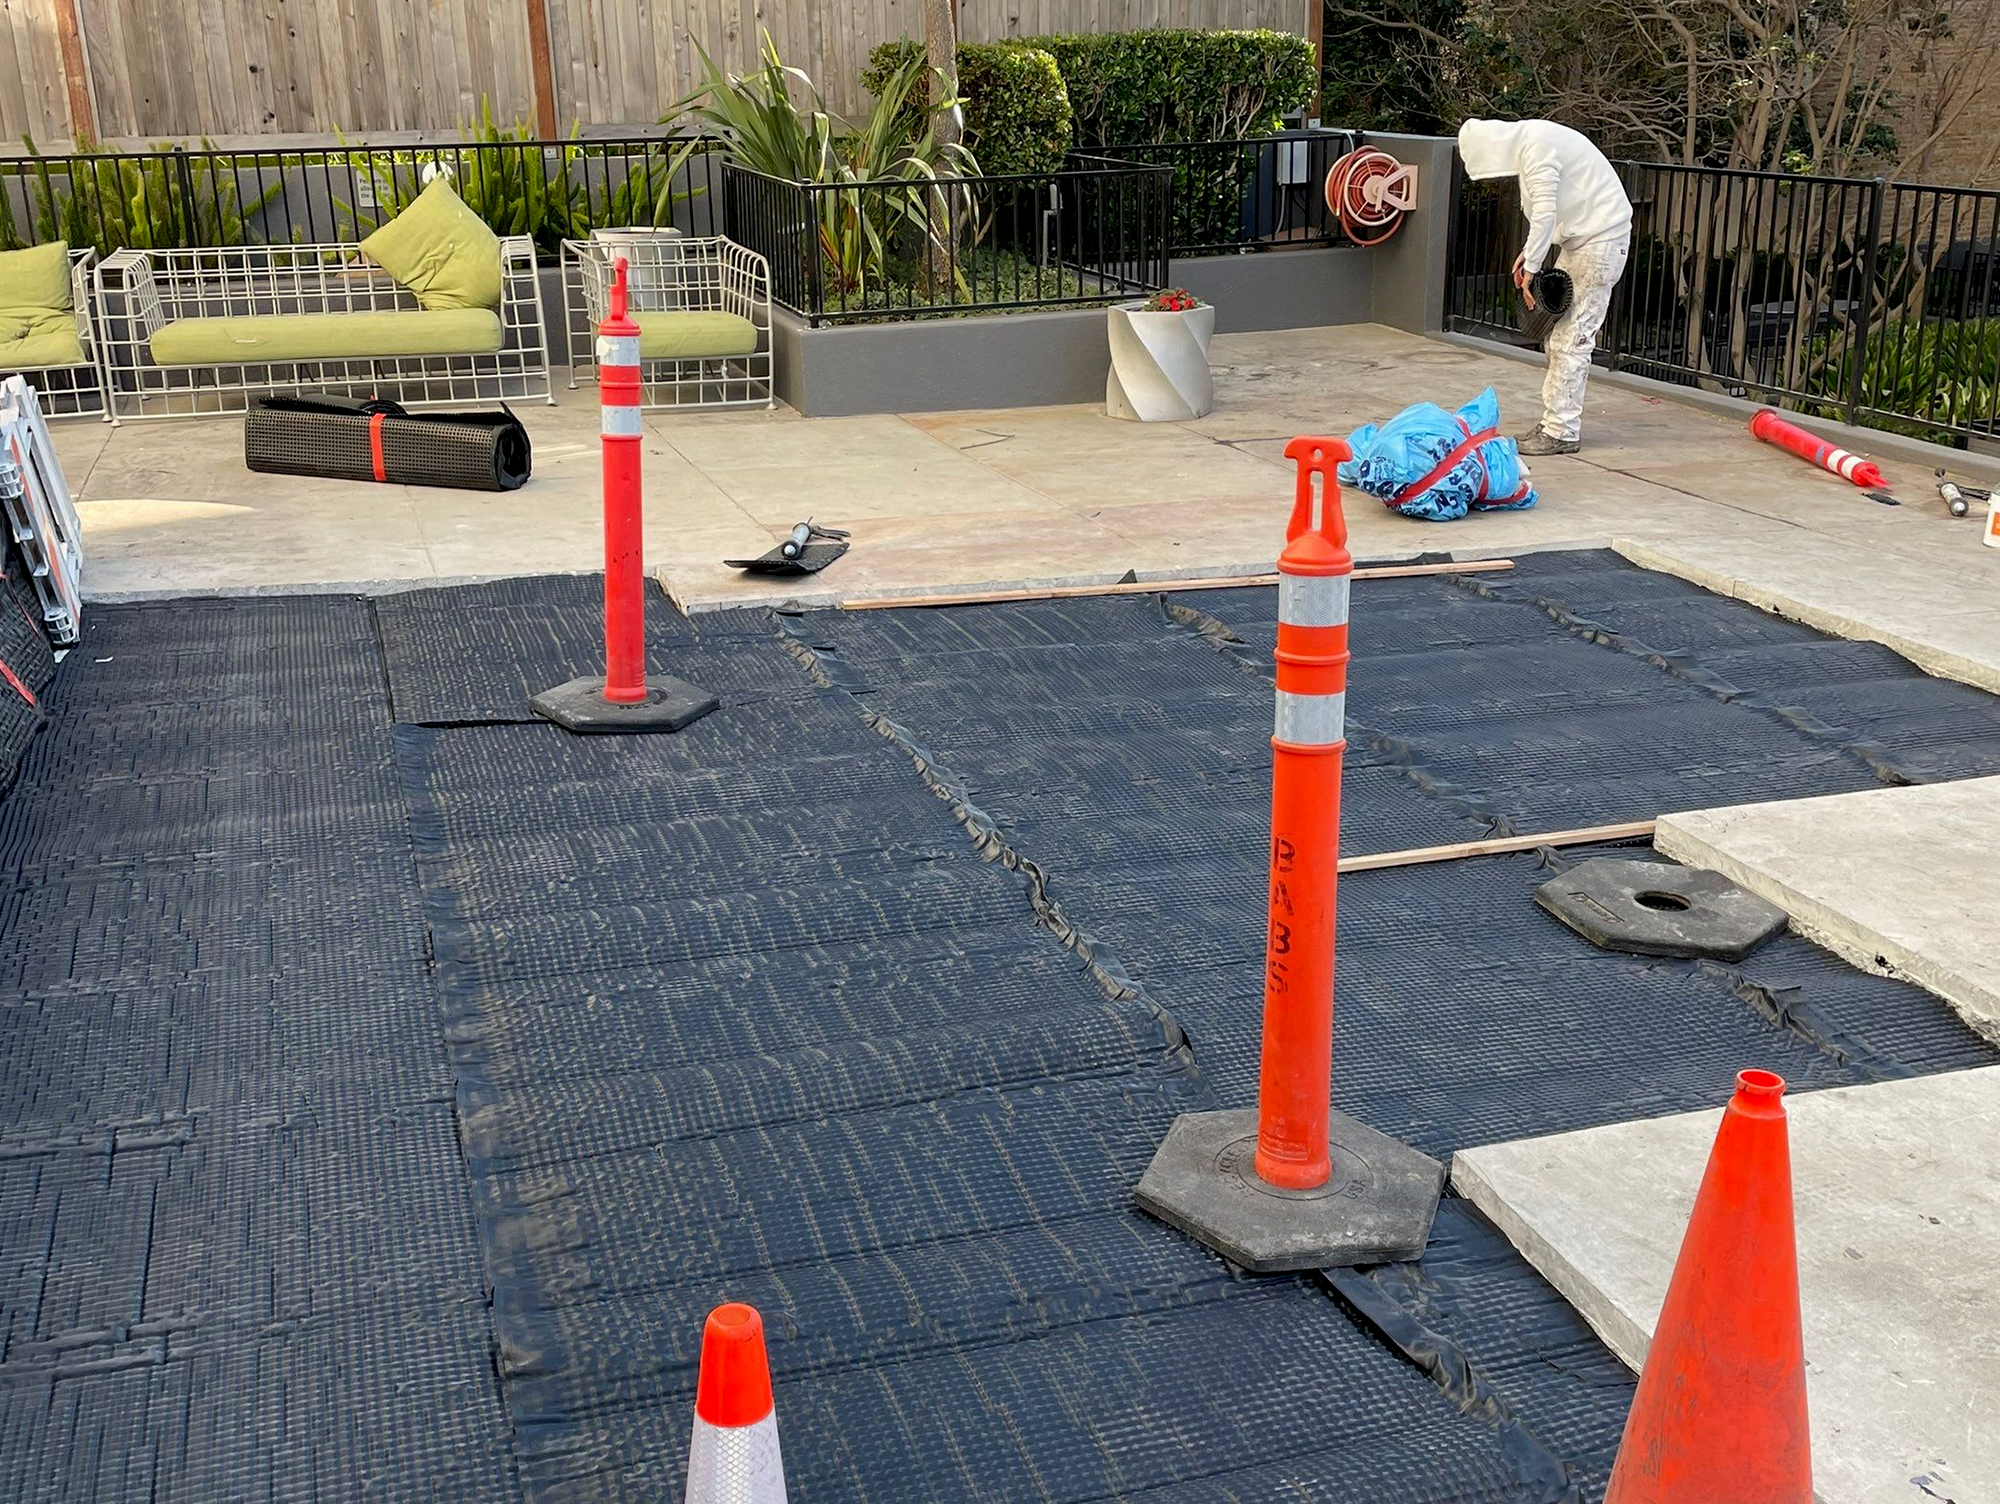
Carefully exposed and prepared existing waterproofing.
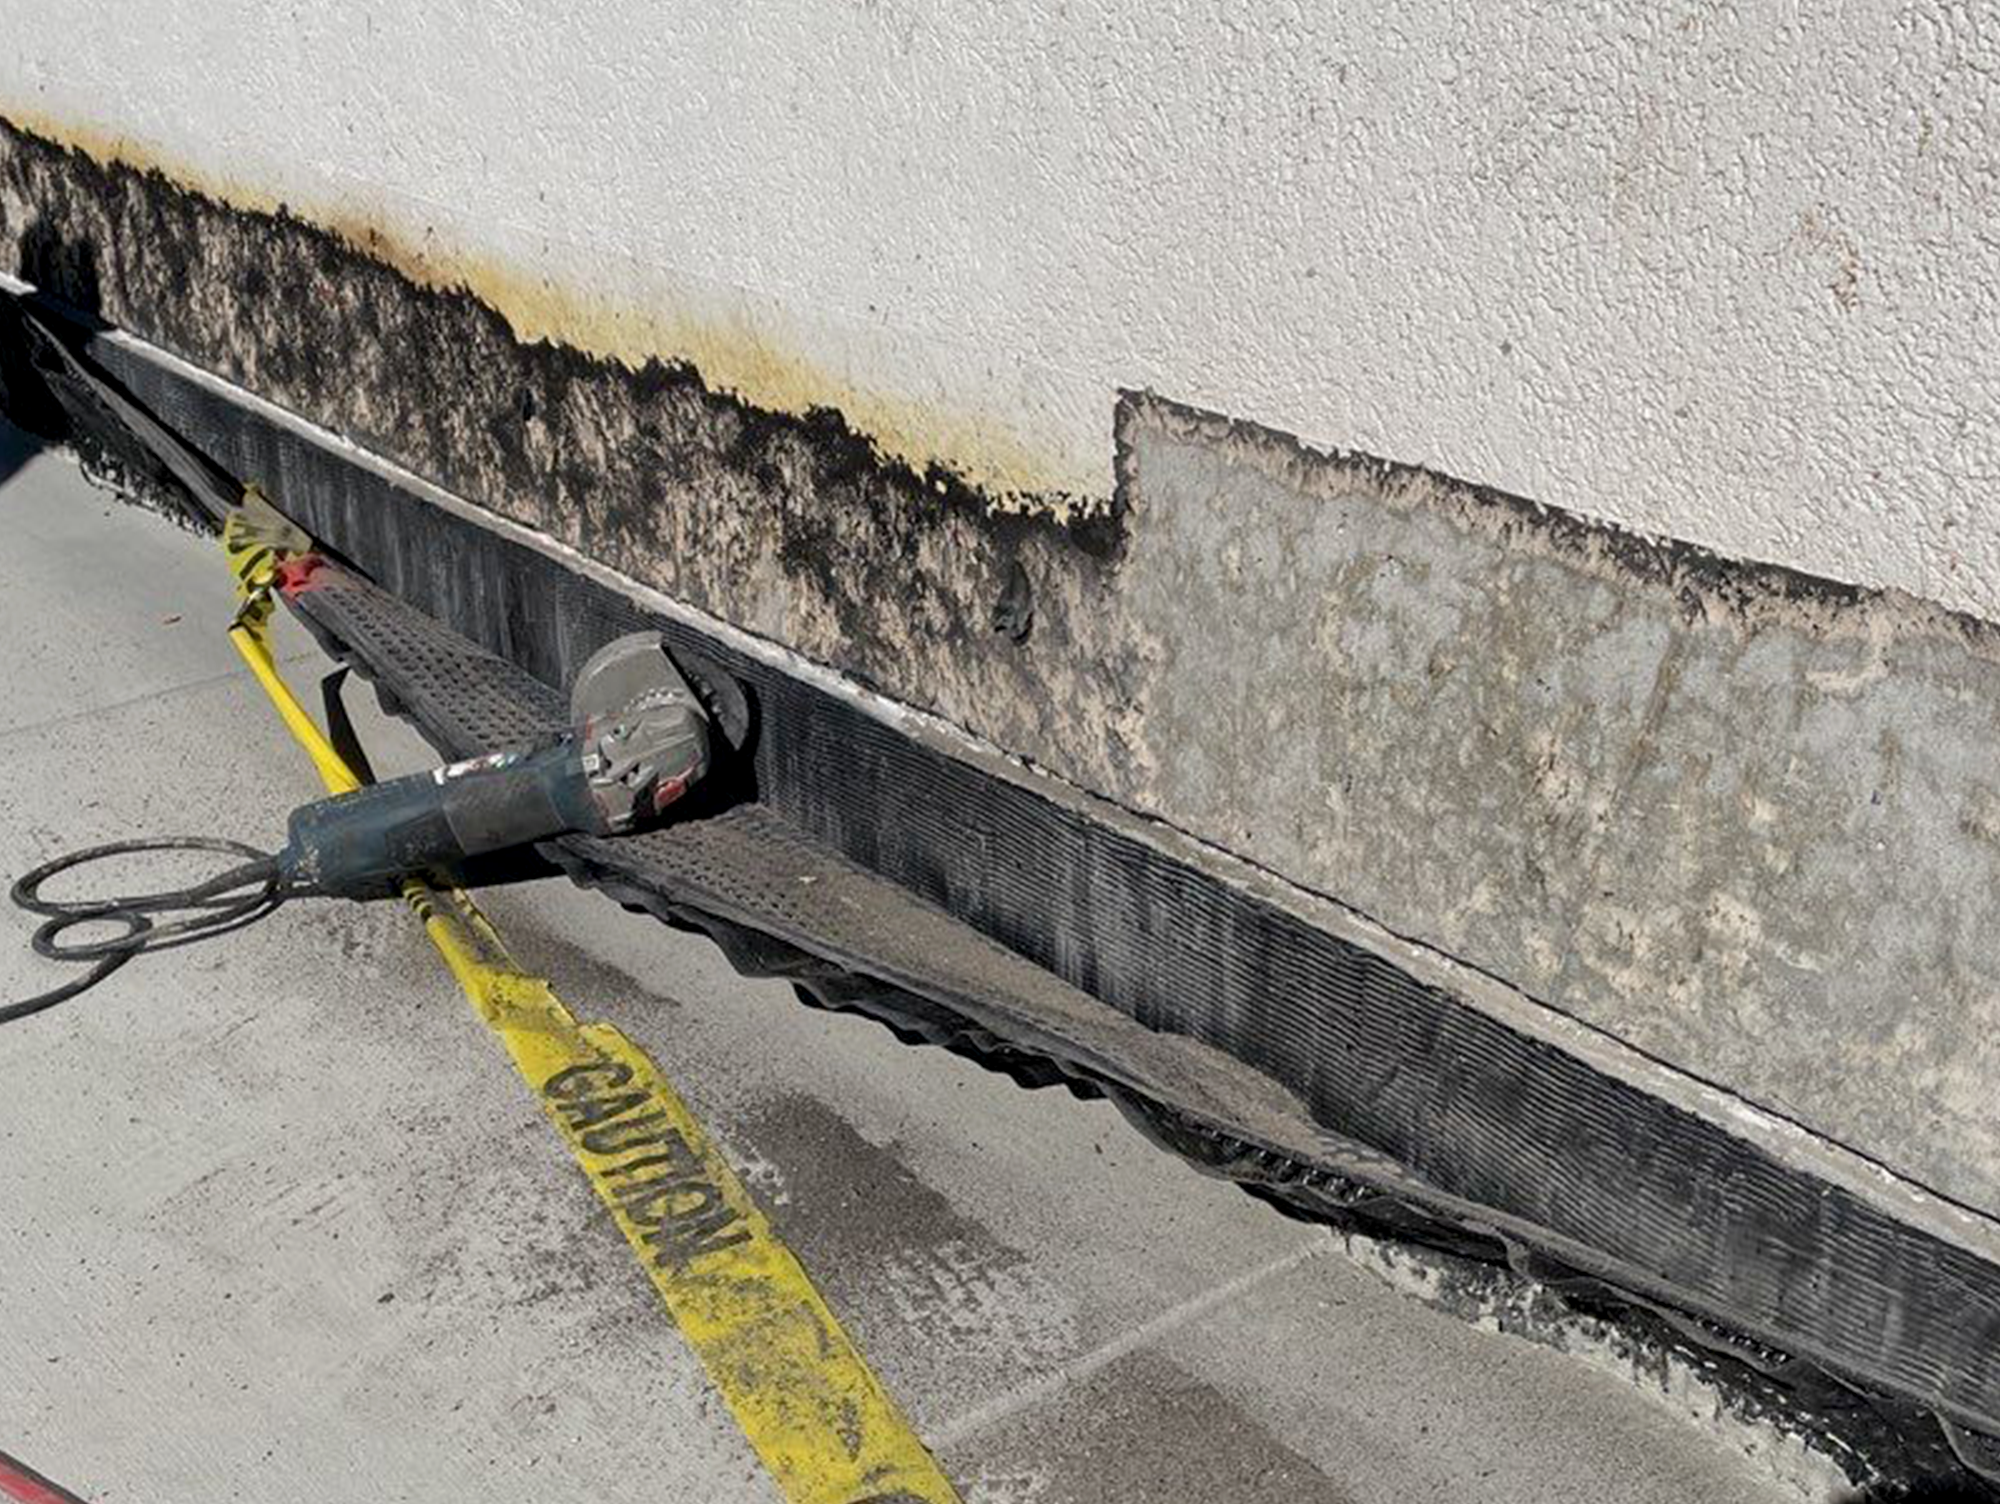
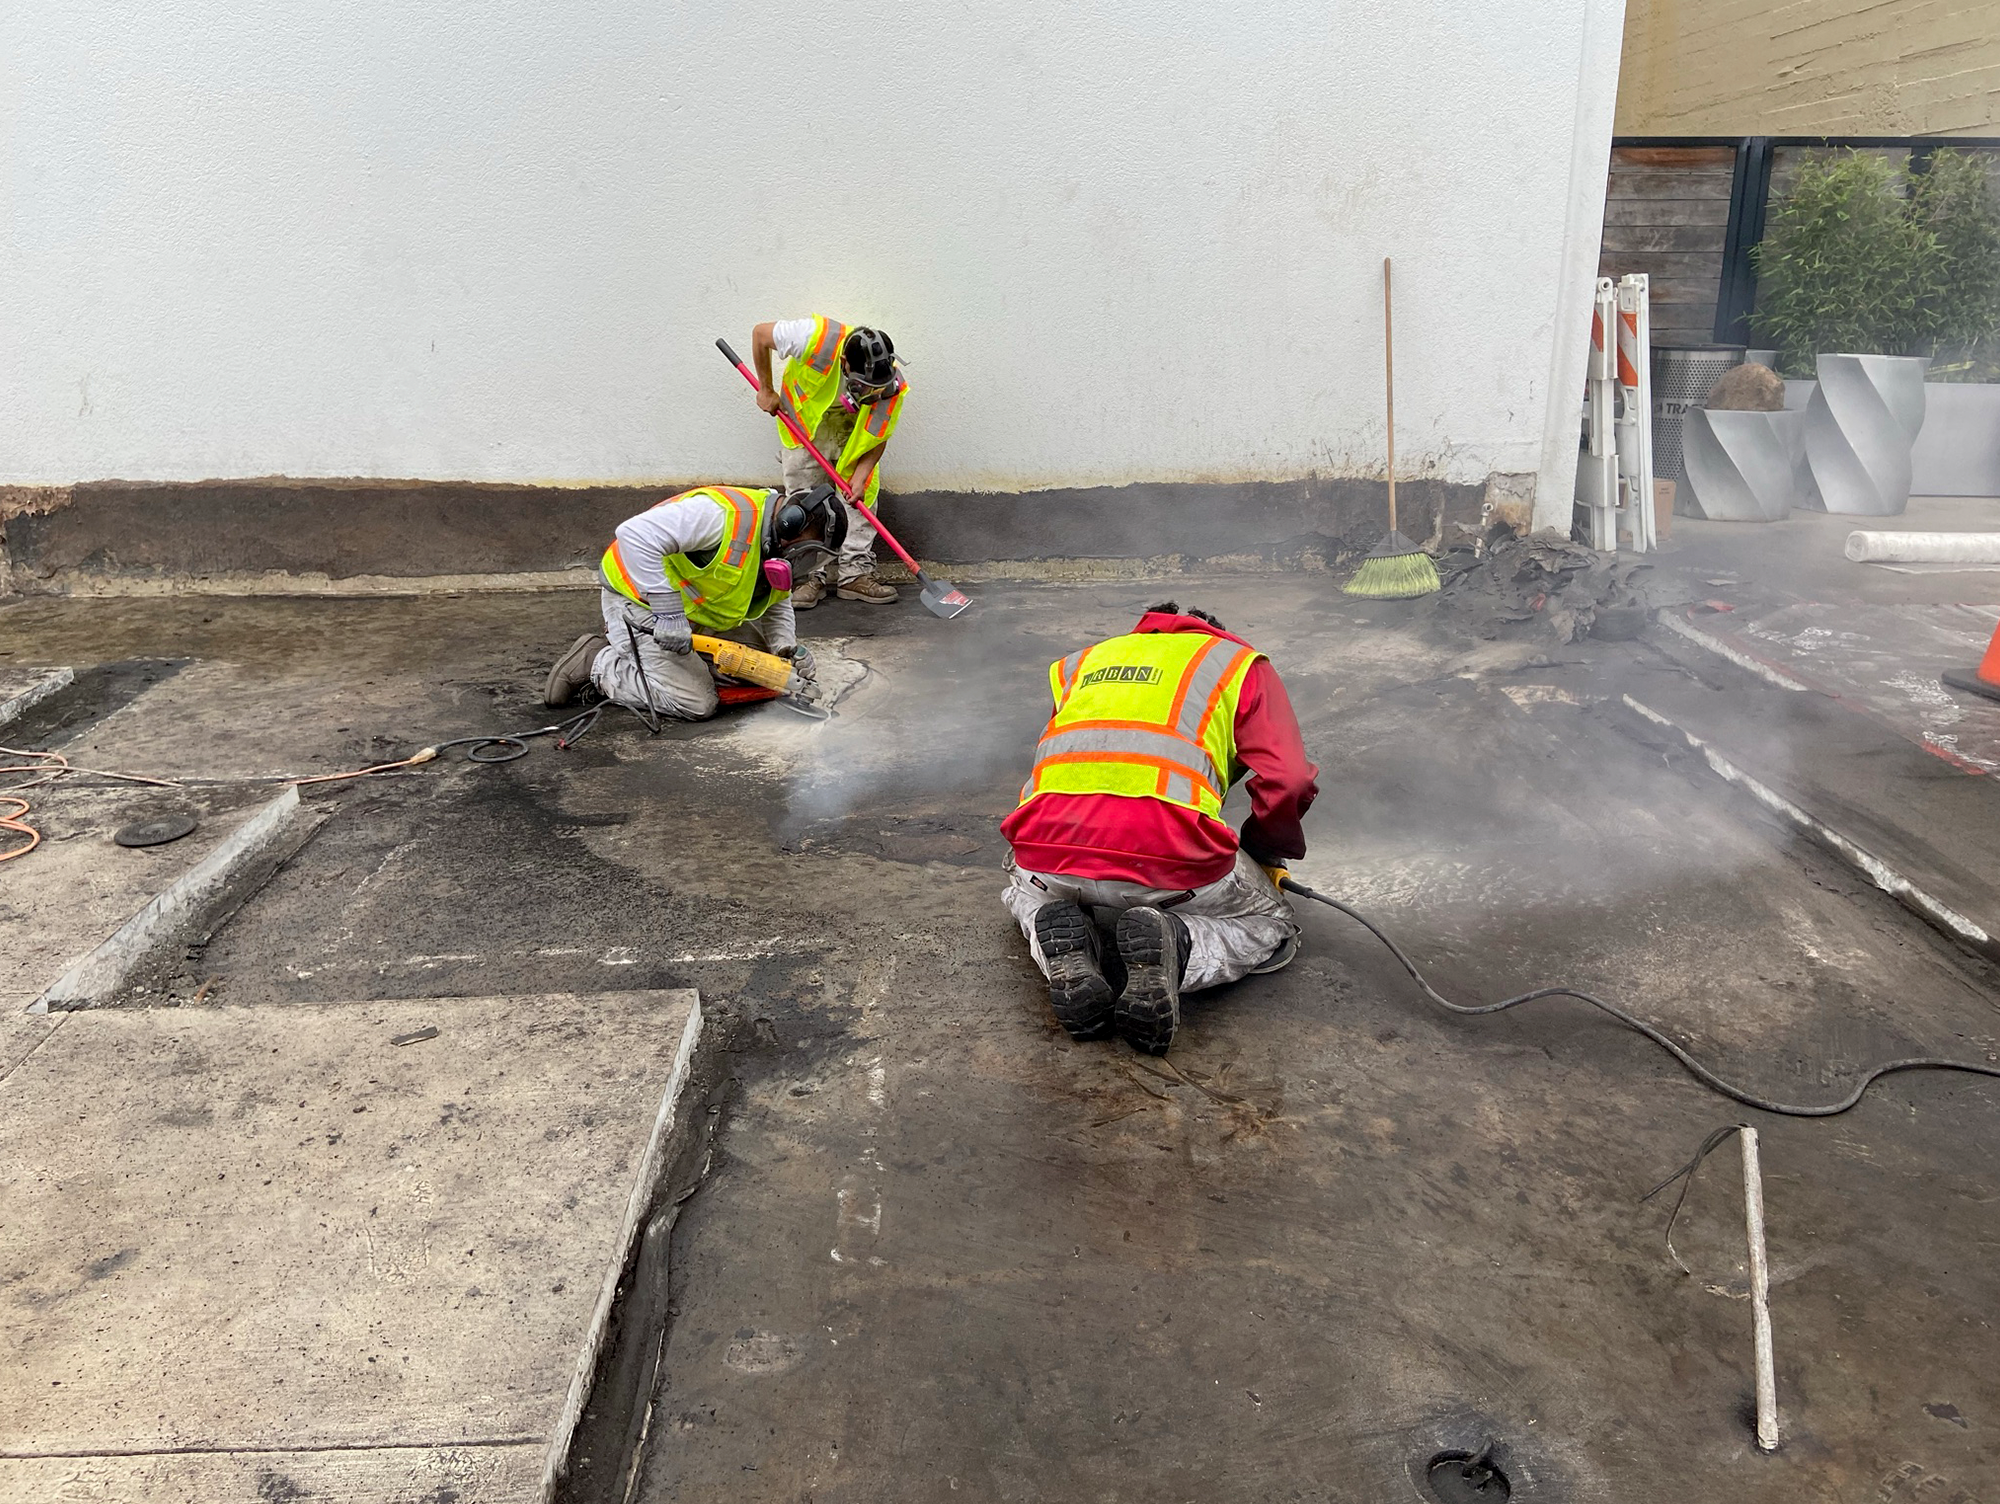
Using grinders, we removed the existing membrane that was compromised.
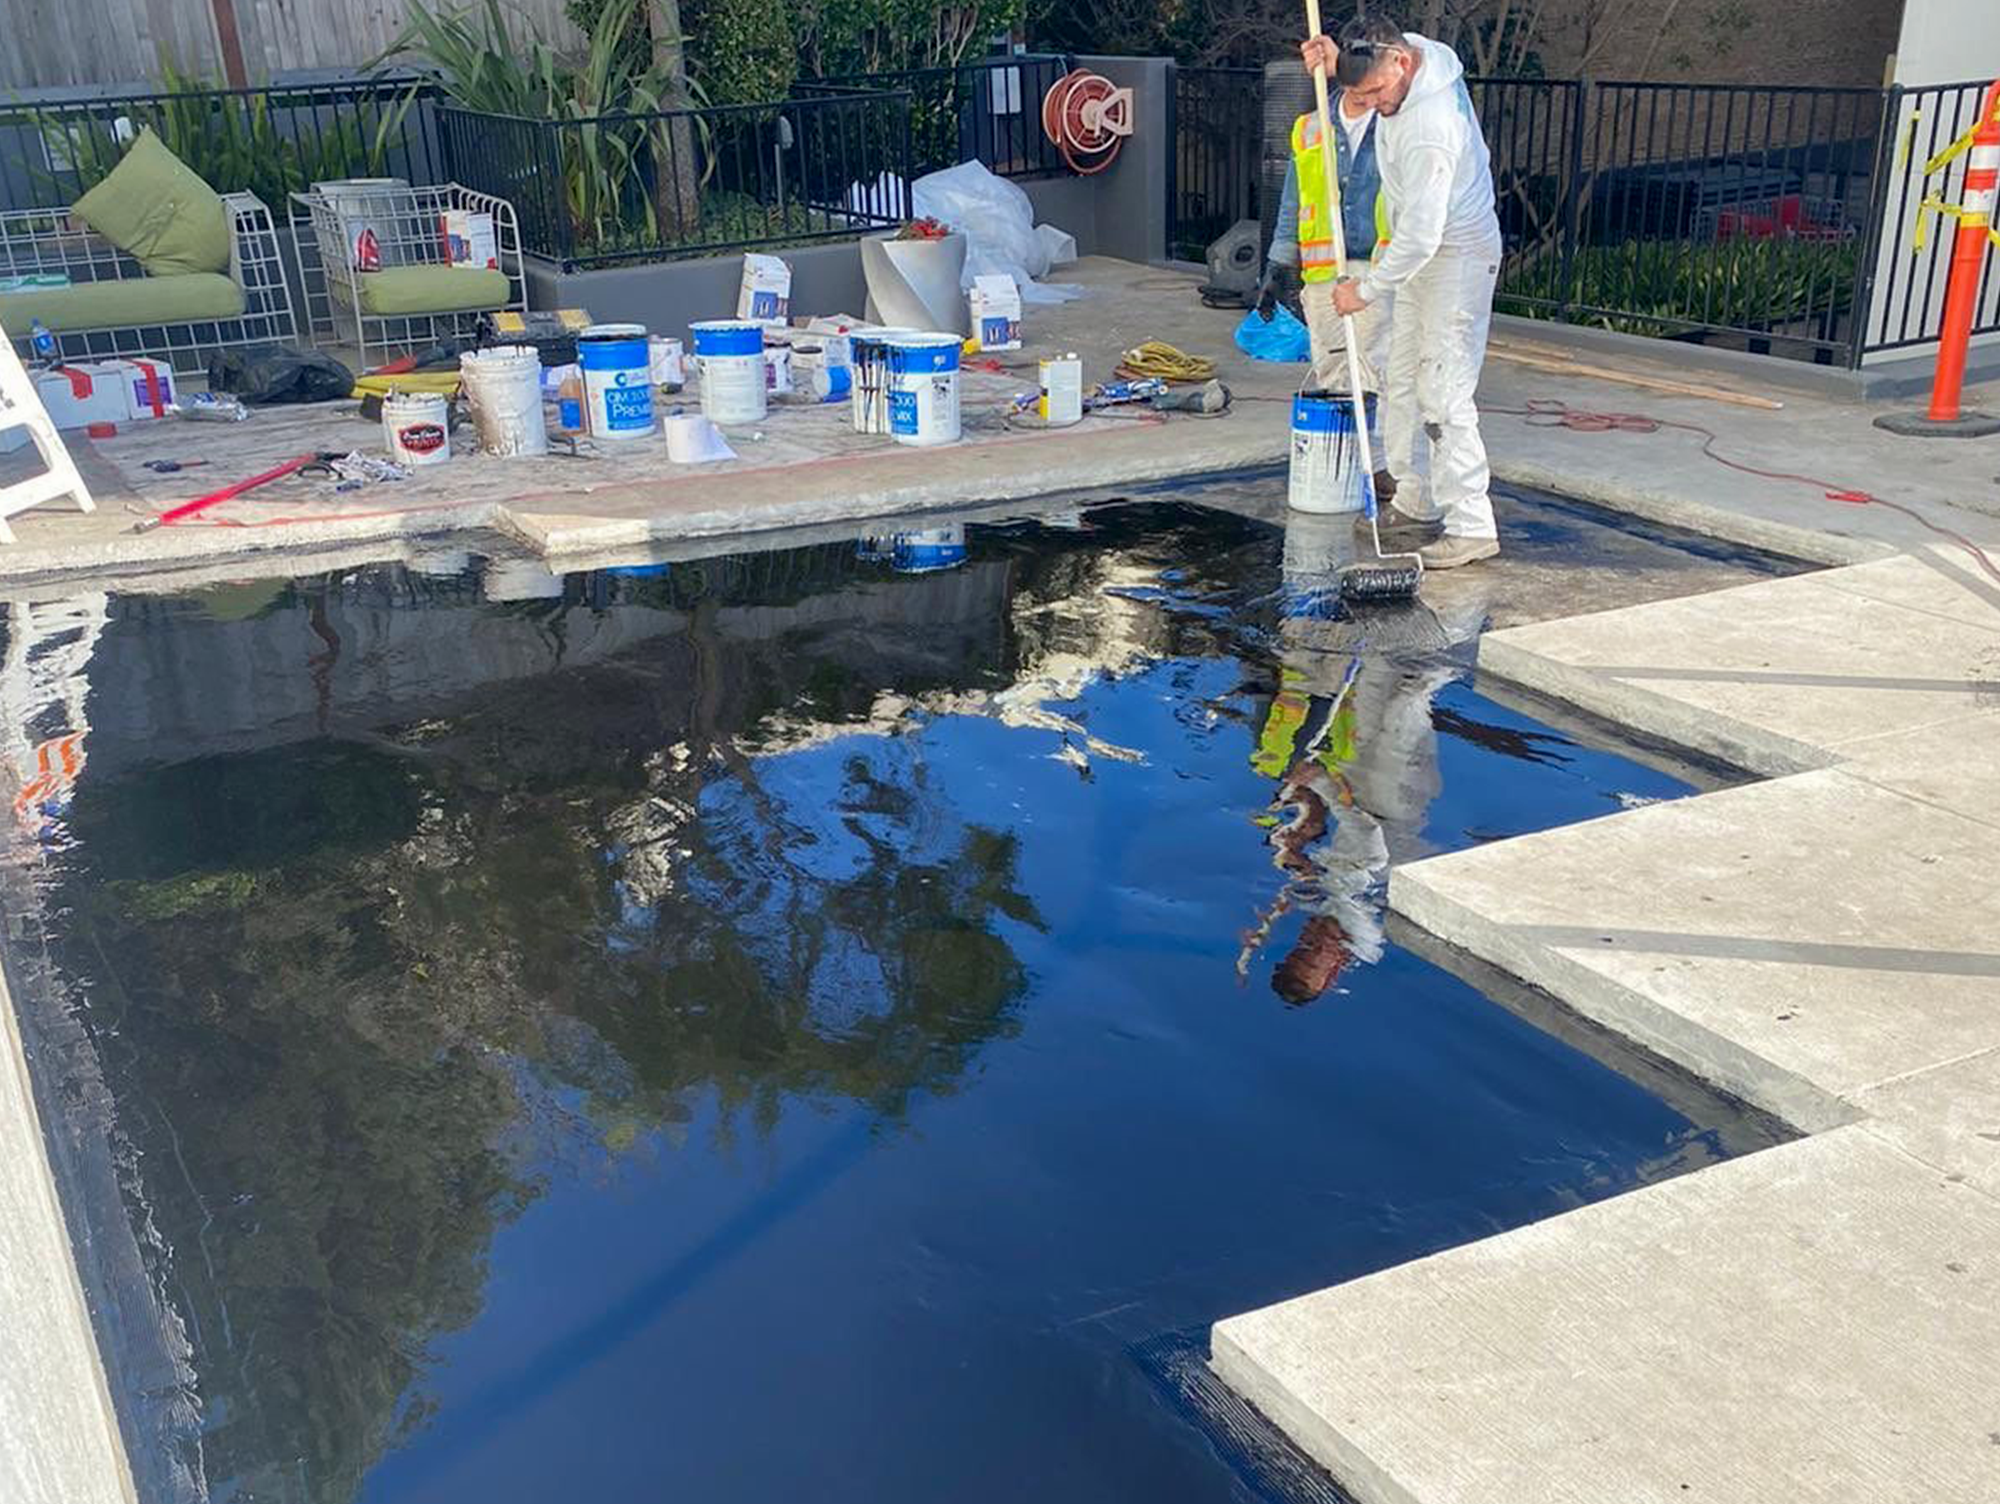
Installed a new CIM 1000 waterproof membrane and drain mat
Installed custom-made flashing at the base of the wall.
Retextured and coated wall section that was formerly covered by the planter box.
Project Details
Podium slab waterproofing, especially patching and integrating with an existing membrane, requires very careful detailing at the edges. During demo, it is critical to remove just enough concrete to expose the edges of the membrane but not too much to actually damage it. Then, everything needs to be carefully cleaned and prepped to make sure no dirt, oil, or other contaminants interfere with the new waterproofing.
With the topping slab removed, we set to work scraping and grinding the existing membrane that was failing. We had to be very careful to preserve 4” around the perimeter so we could tie our new membrane to the existing, maintaining a monolithic membrane. With the existing membrane fragile and filing in places, this was very careful and detailed work.
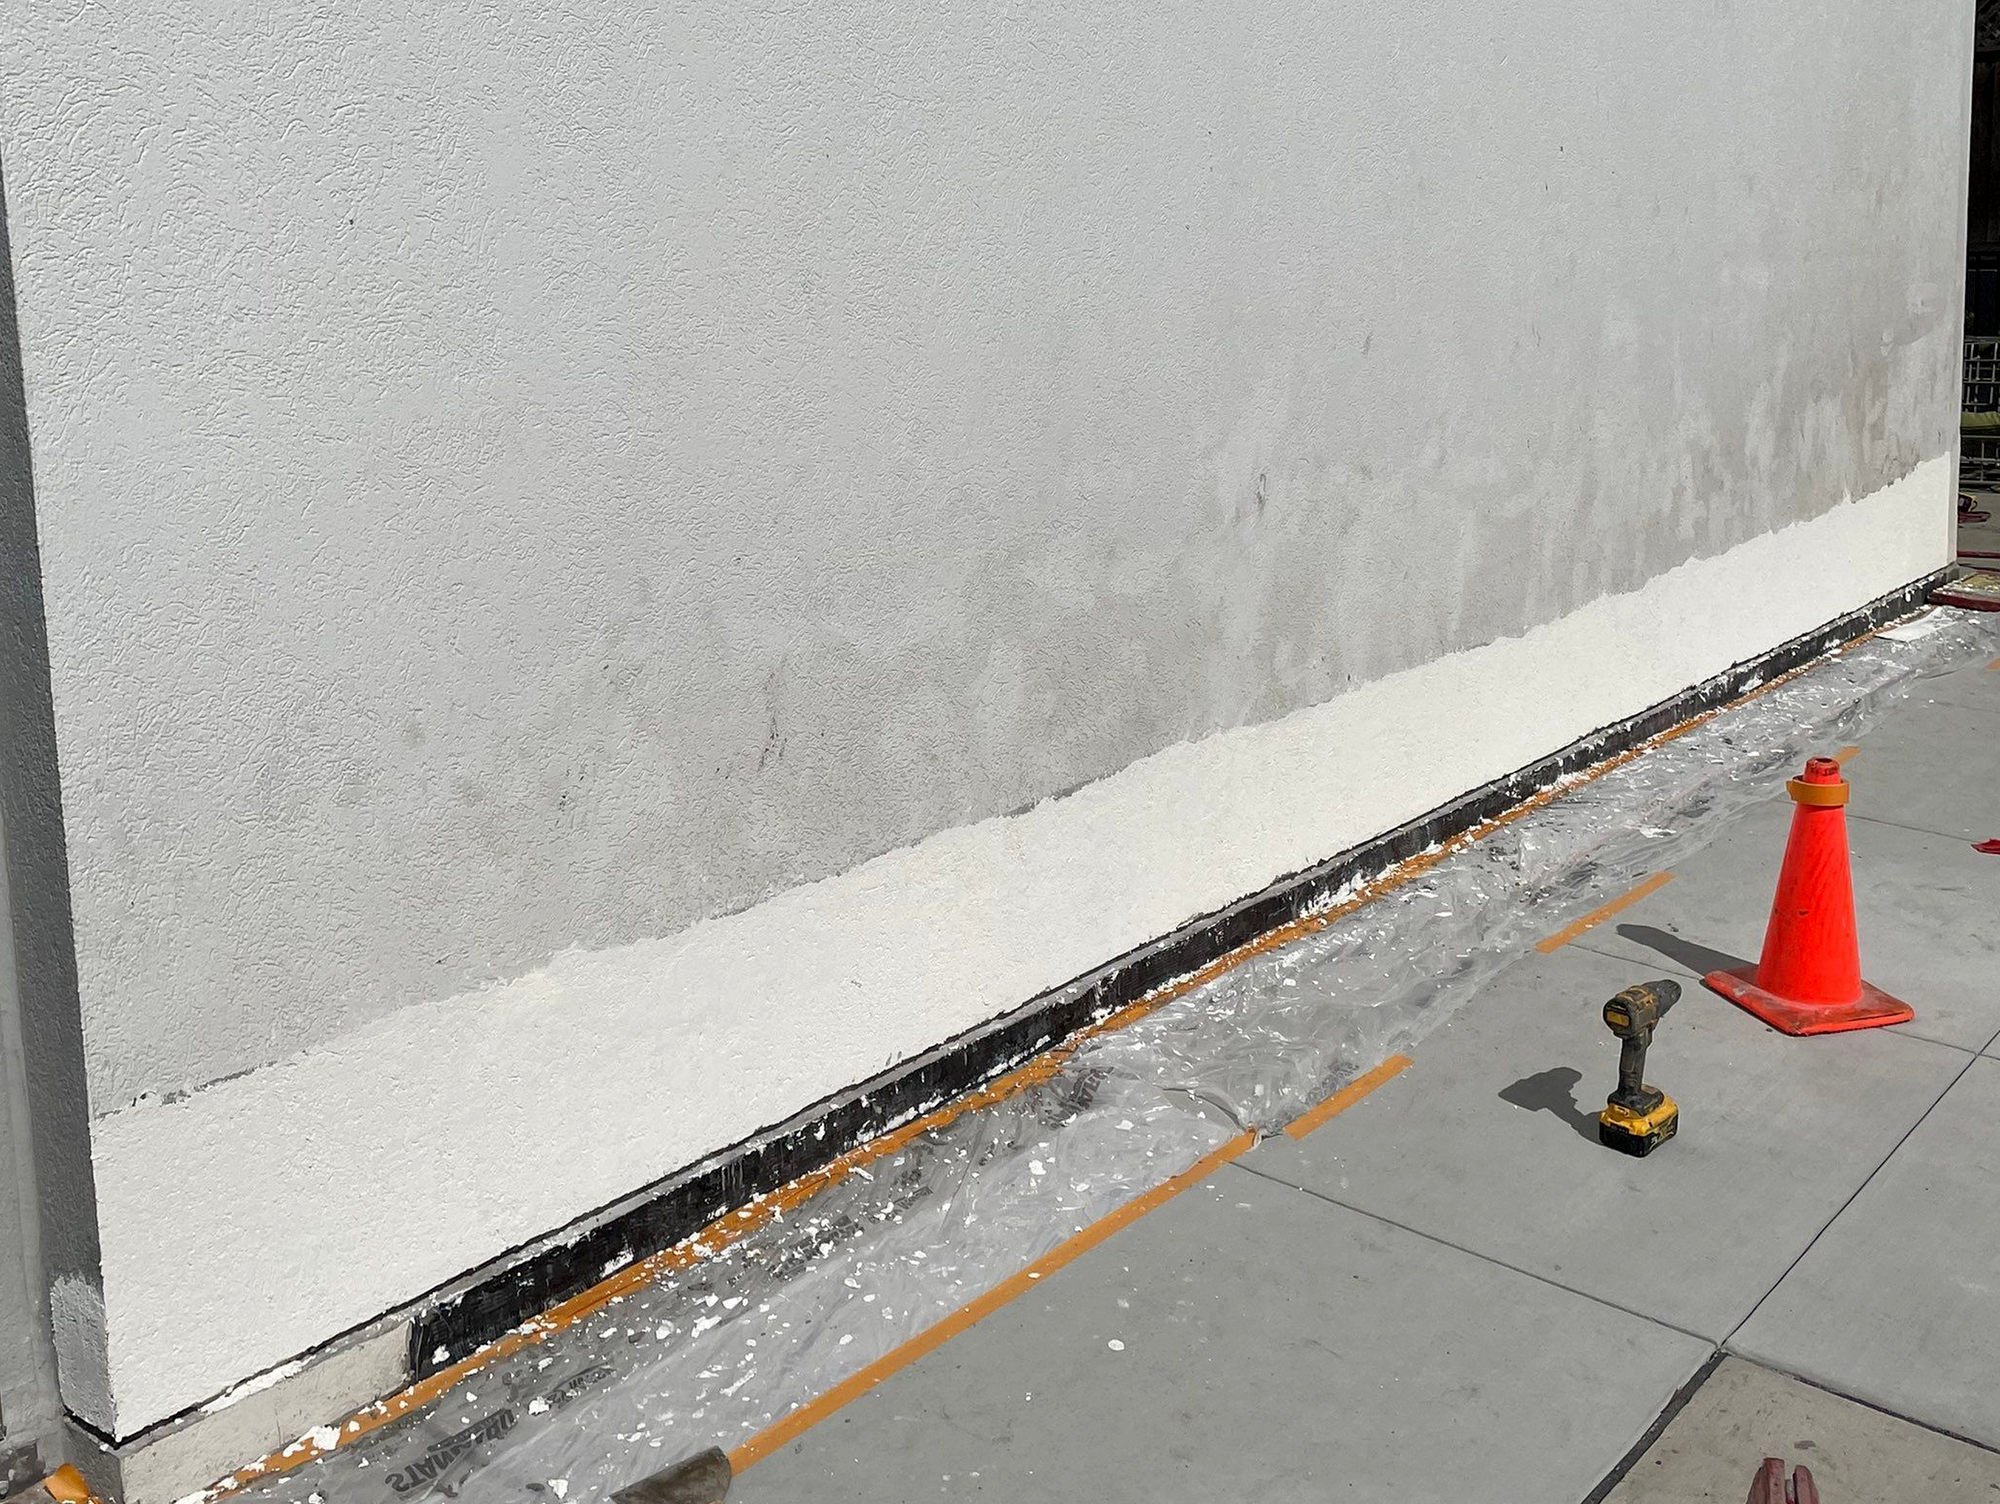
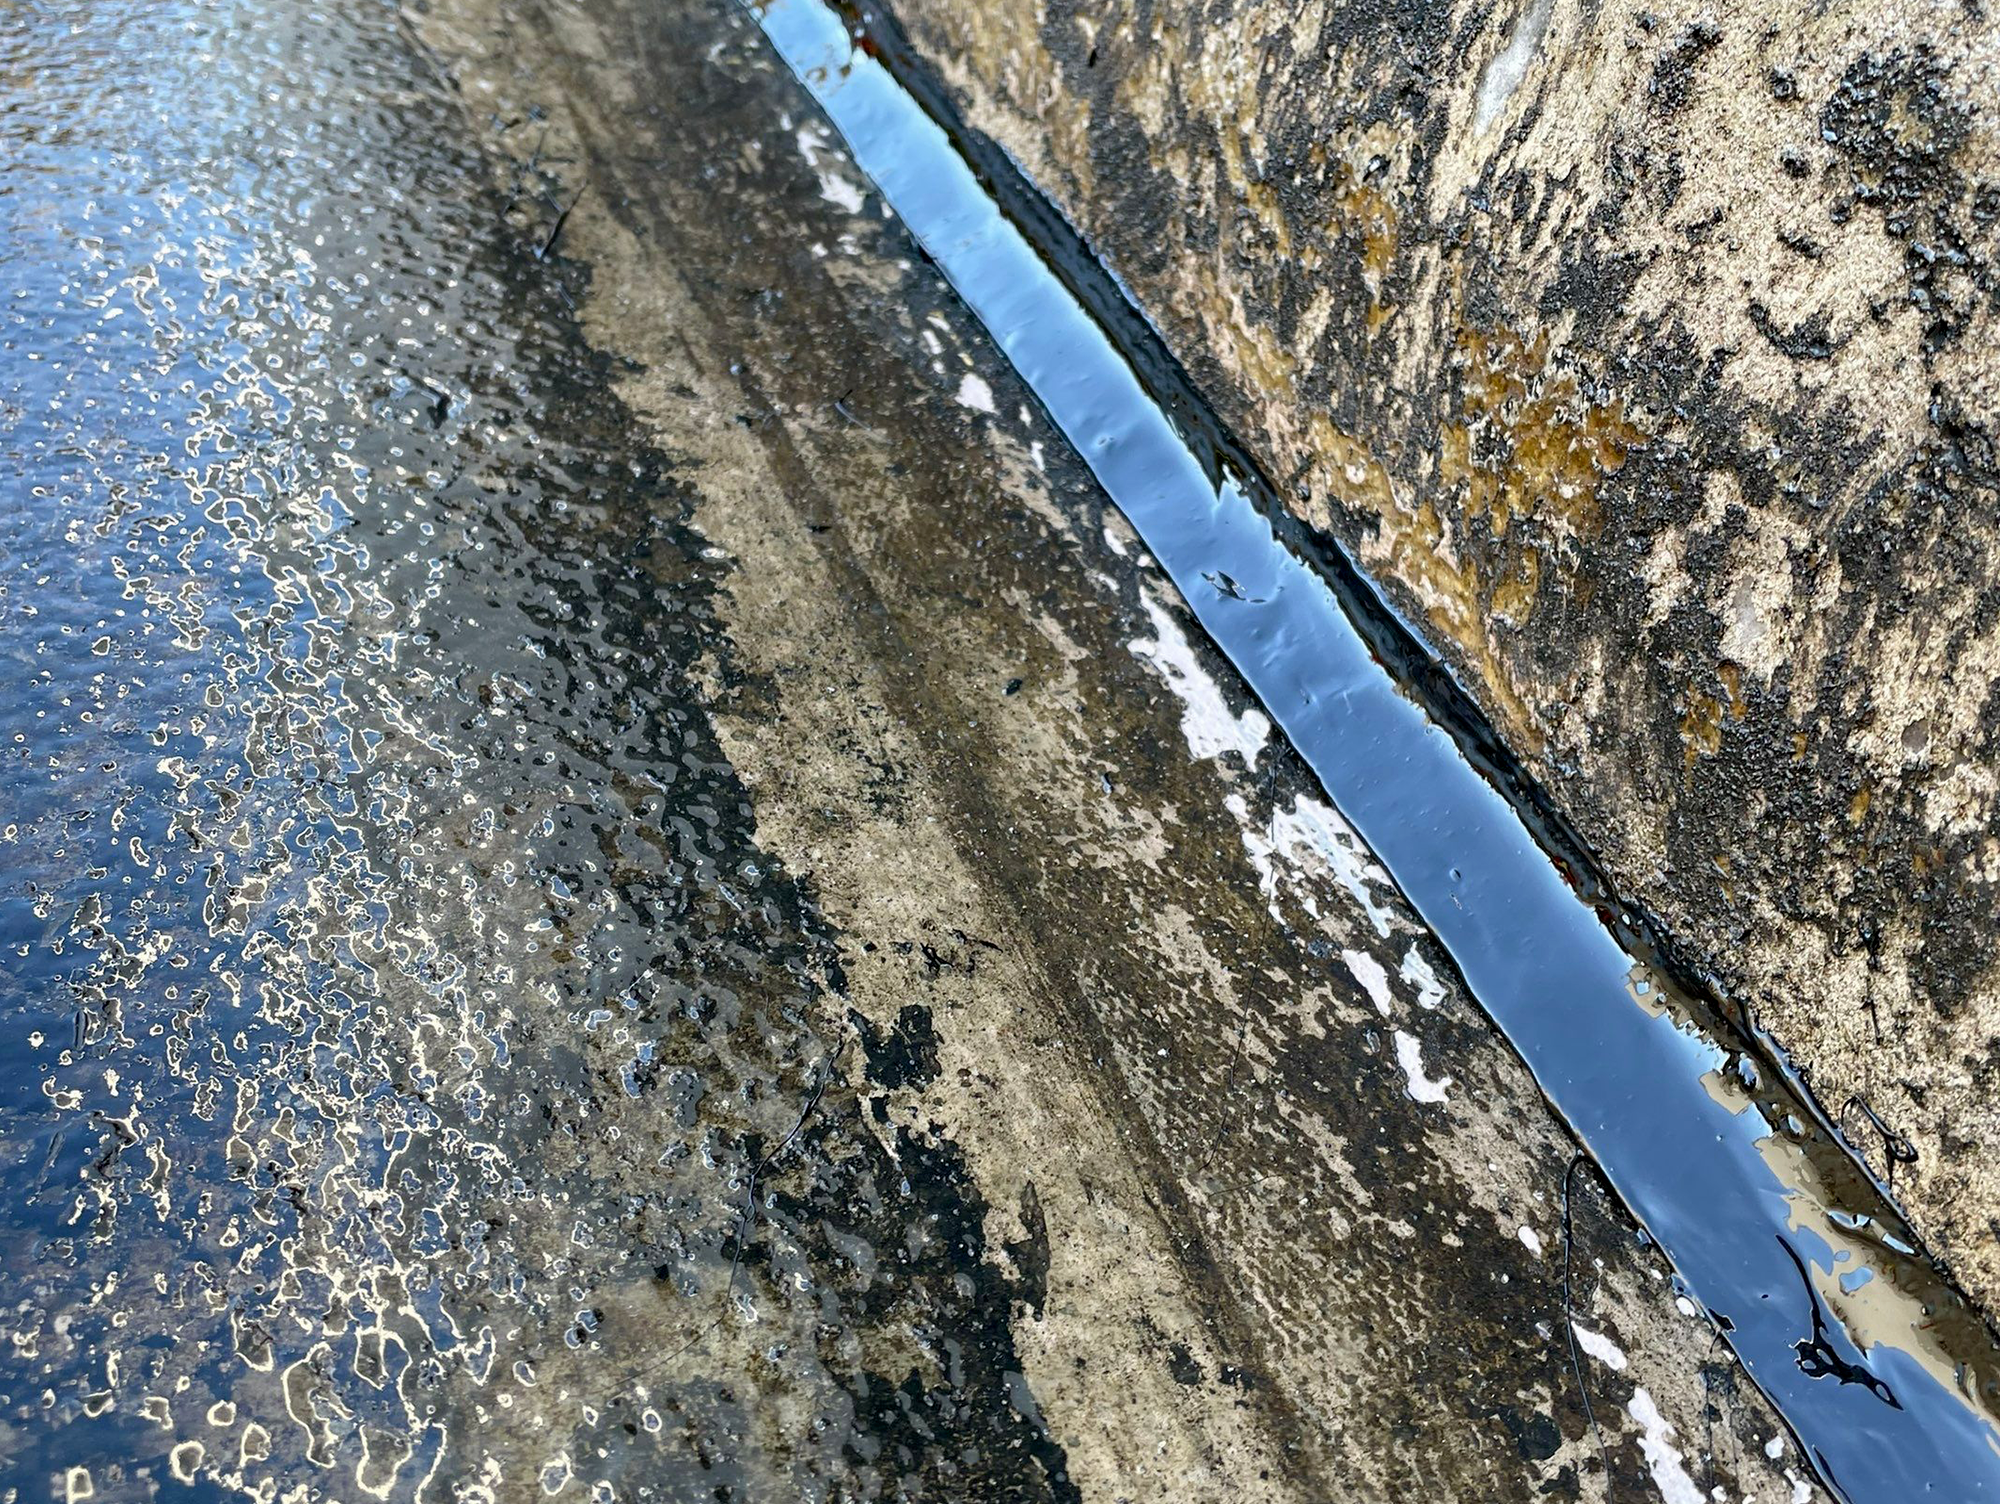
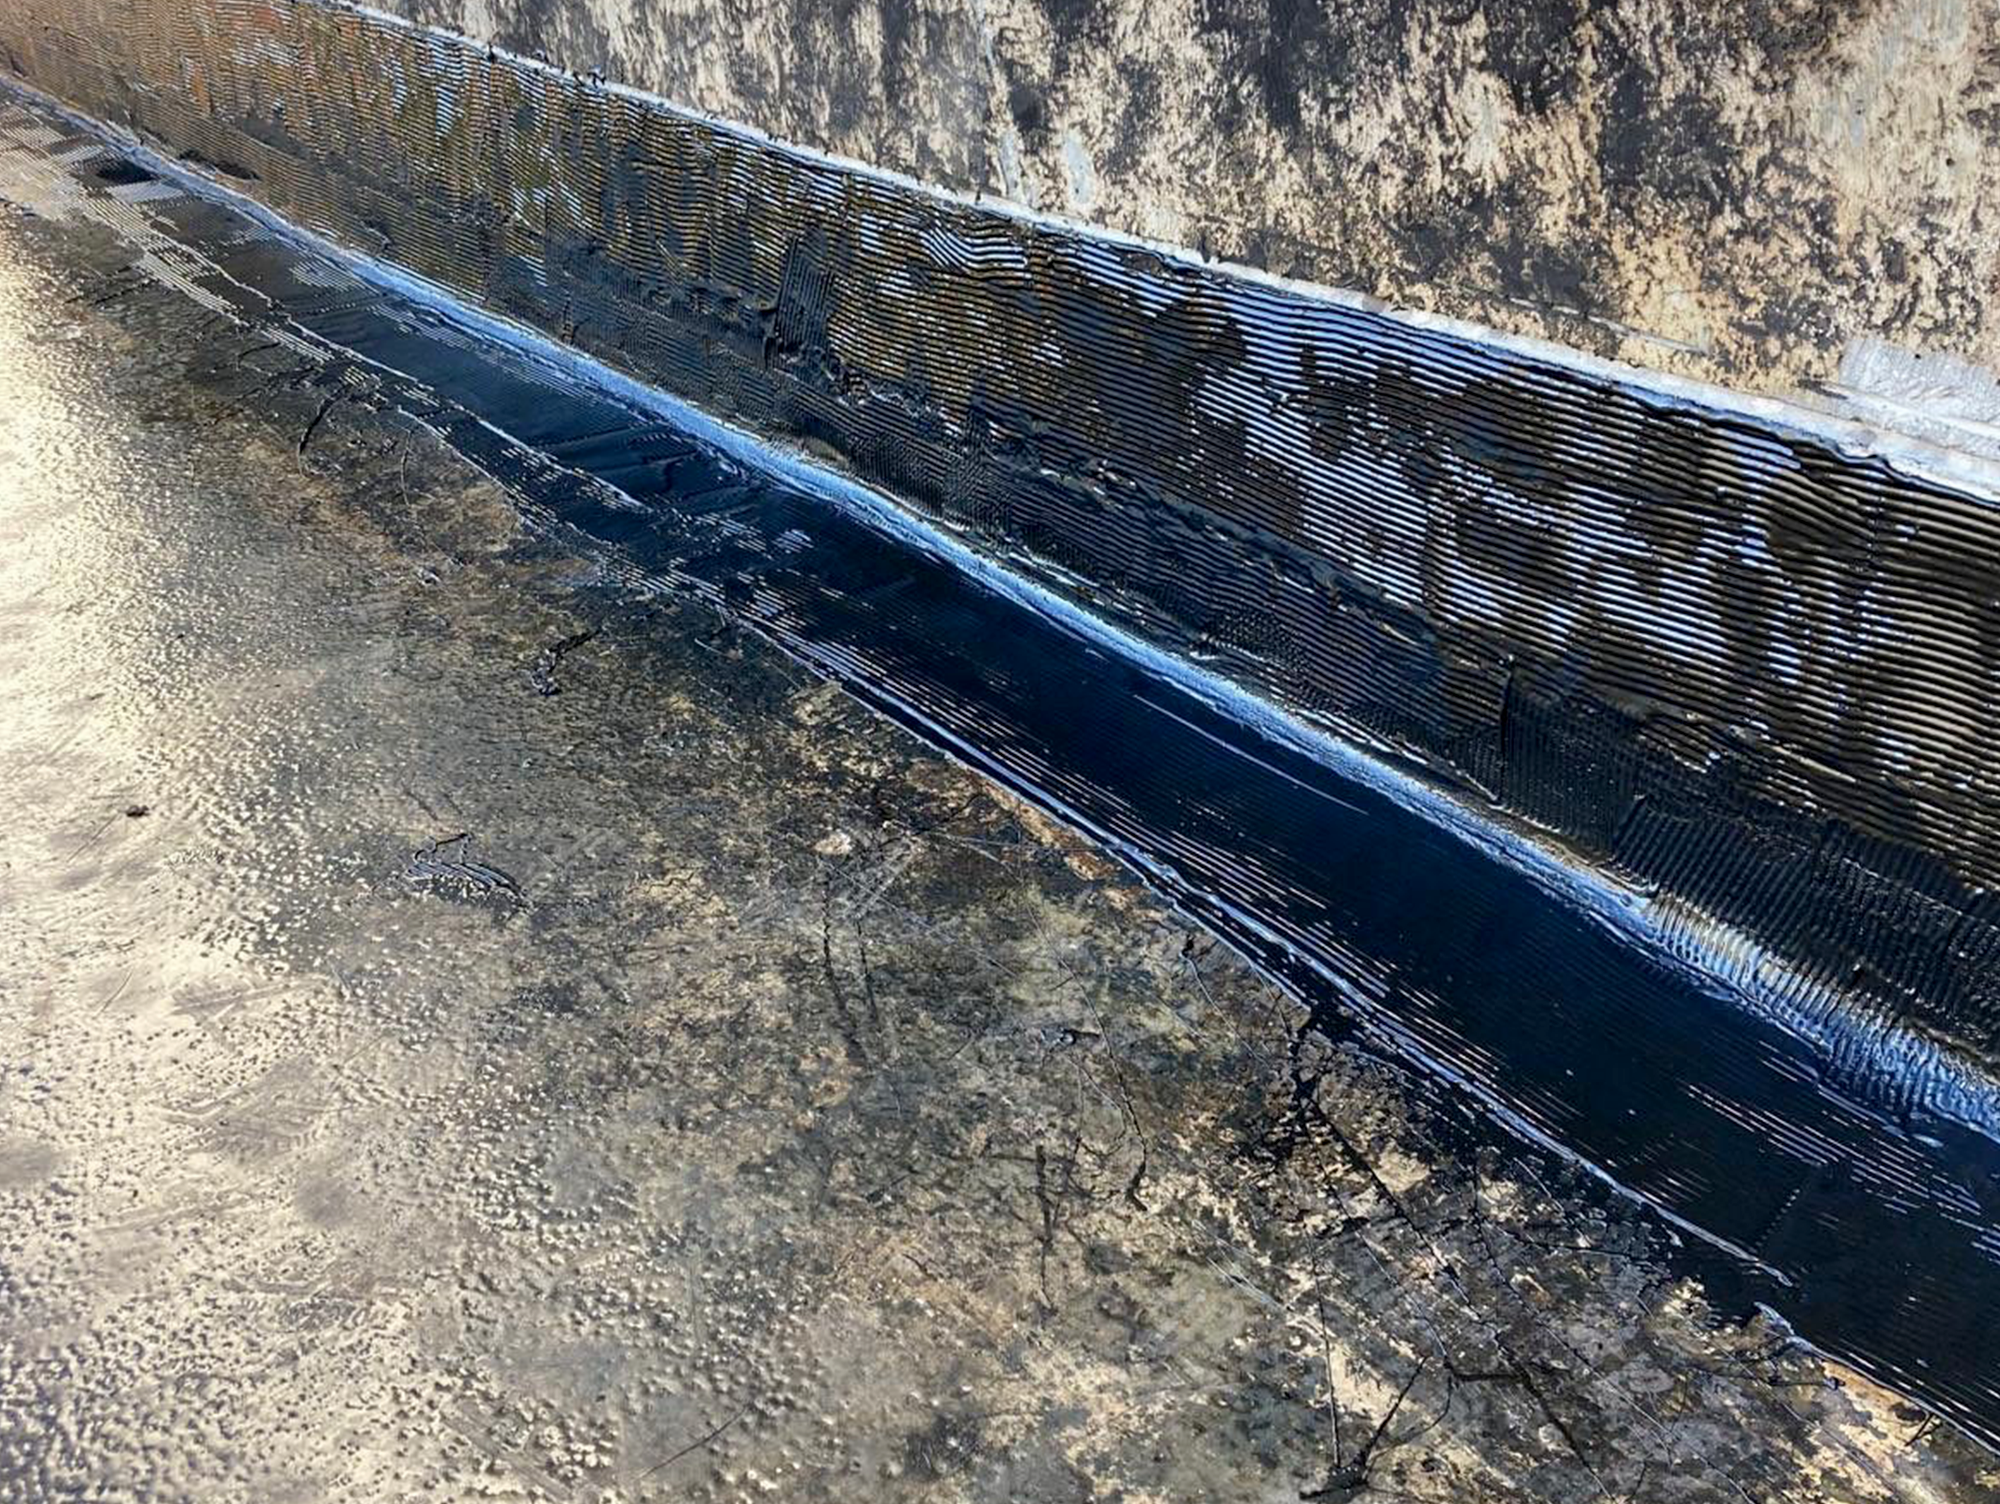
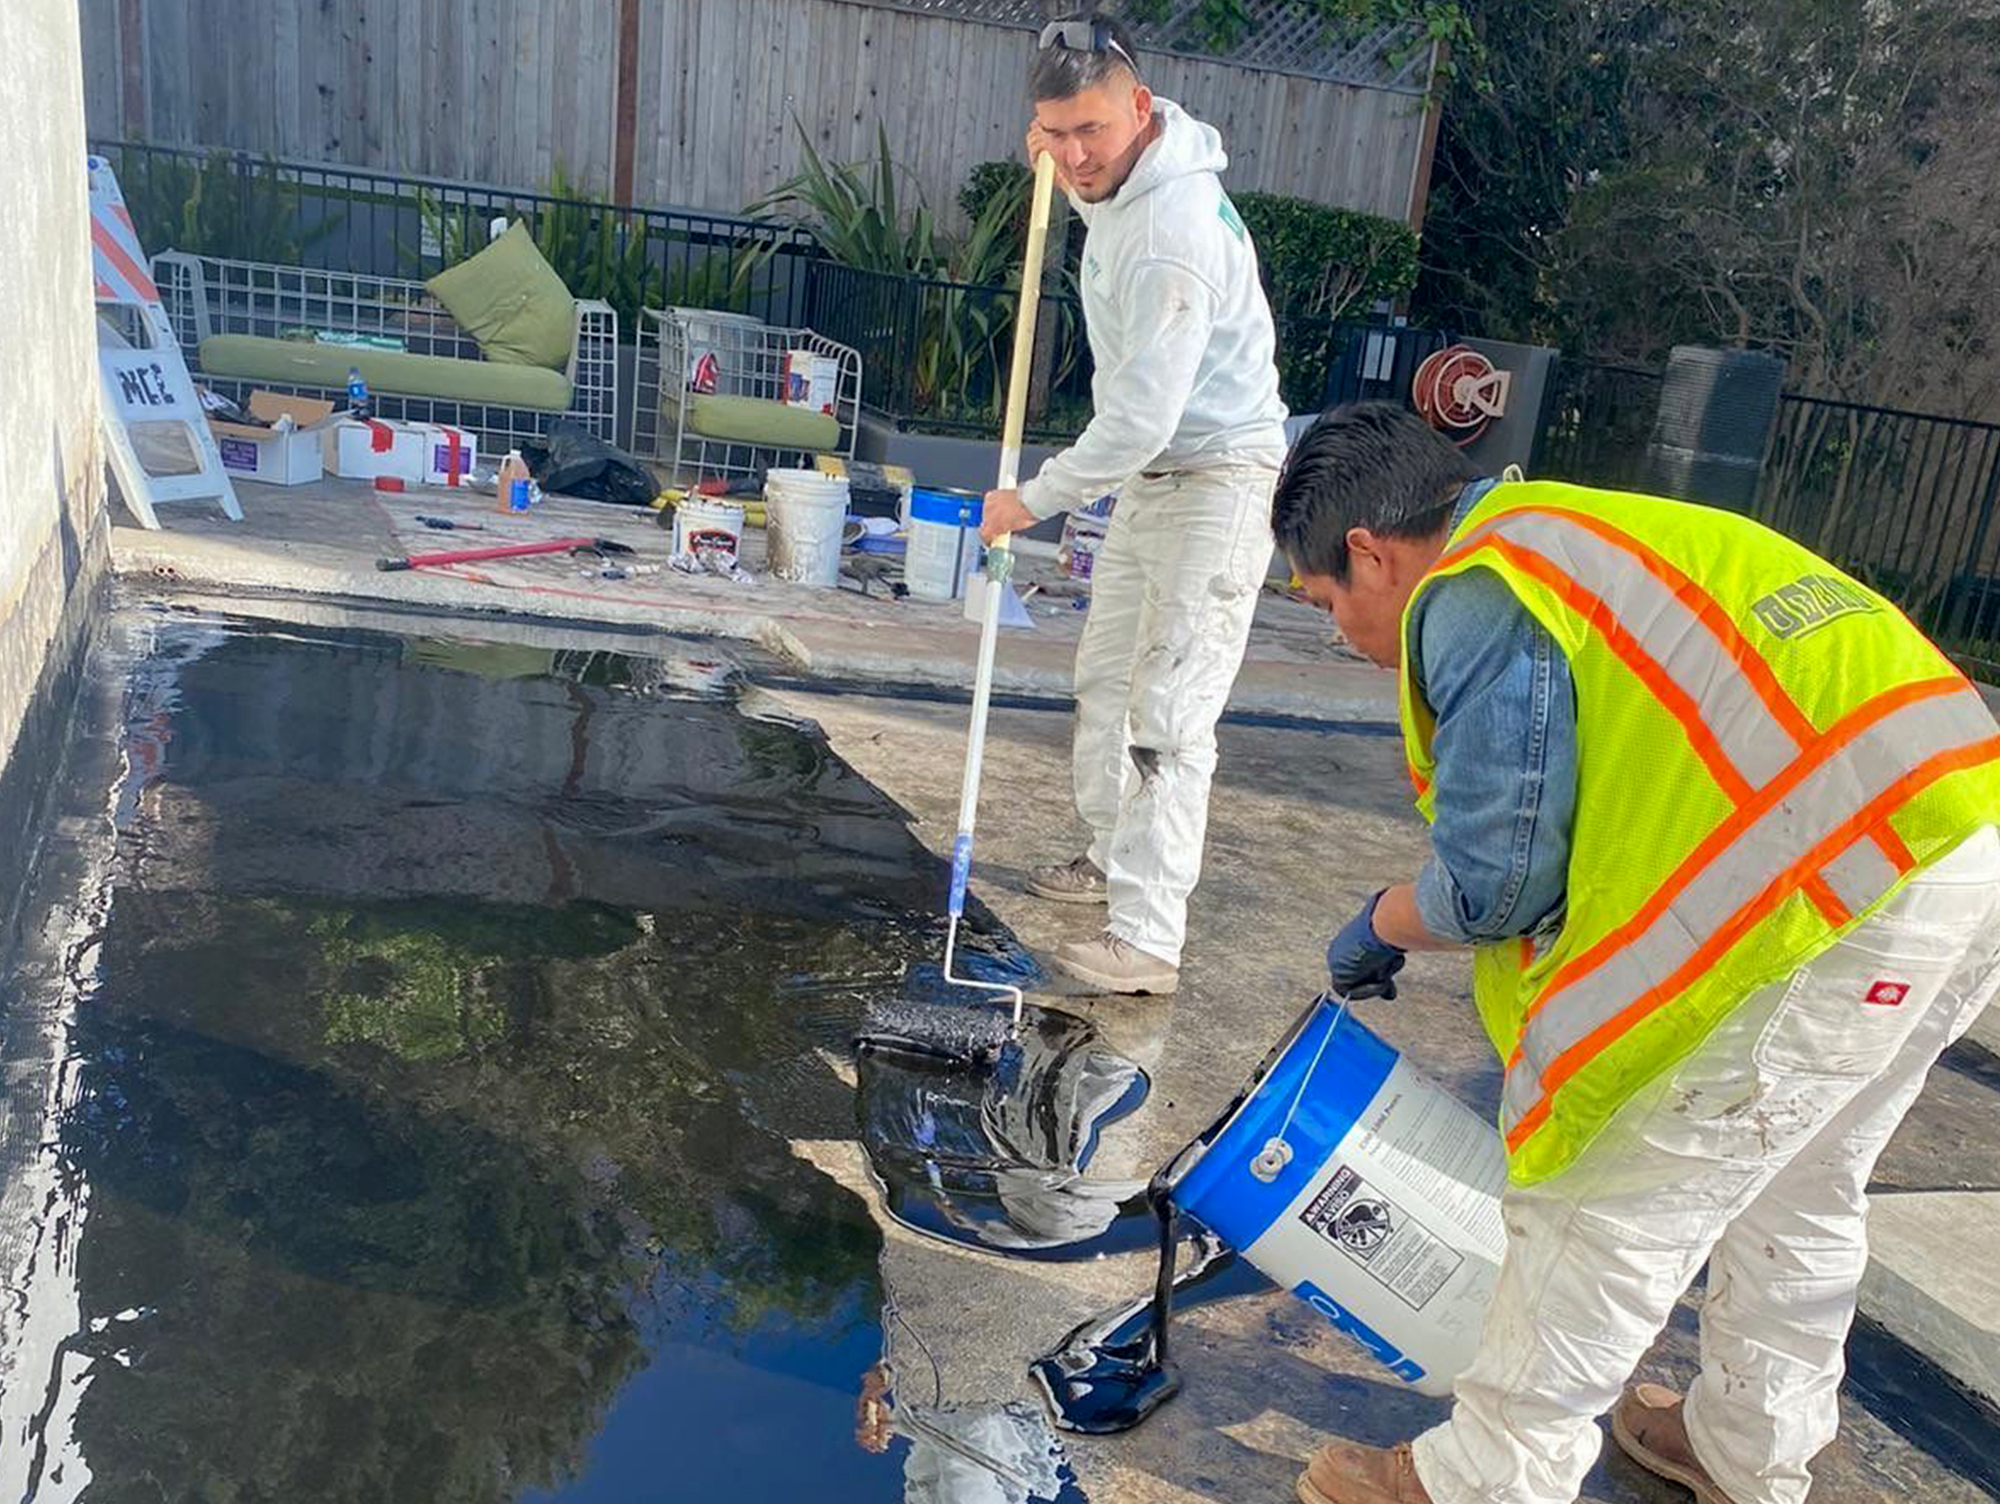
With the slab fully ground and prepped and the existing membrane cleaned and solvent wiped, we primed the patch area and detailed the edges with a three-course application of CIM 1000 and reinforcing scrim. This formed a stout connection between the new and old membranes. Once all of the edge-detailing was complete, we applied the CIM 1000 to the field and, when cured, covered it with a drain mat.
After that, a new topping slab was poured, and we returned to install new, custom-made stainless steel flashing for the base of the wall to match the existing caulking.
Finally, there was about 18” of the wall base that was covered with a membrane that was part of the planter box that was removed. This all needed to be ground off and retextured to match the surrounding wall. Once complete, the patch was primed, and the whole wall was recoated to finish off the new common area.
Want to know how we can help with your next project?